Instructions for submitting samples
1. Accessing the Sample Hub
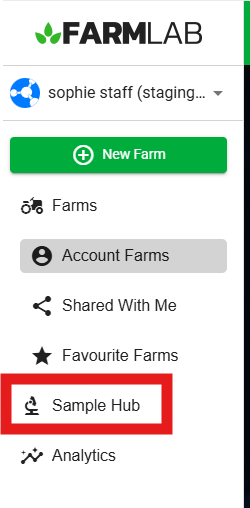
- Option 1: From the dashboard screen, click on the Sample Hub icon.

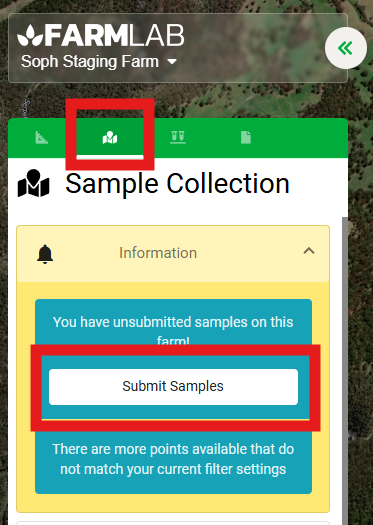
- Option 2: From your farm, select "Submit Samples" from the sample collection menu.

2. Creating a Batch
- Click on "+ New Batch".

3. Select Billing Account
- If you are a part of multiple accounts, you will be required to firstly select which FarmLab account you would like the batch billed to.
Choosing Your Sample Type
- If you have collected multiple sample types with the mobile app, you will be prompted to choose which sample type you would like to submit. This is because the labs and test codes will differ depending on the sample type.
- Select your sample type.

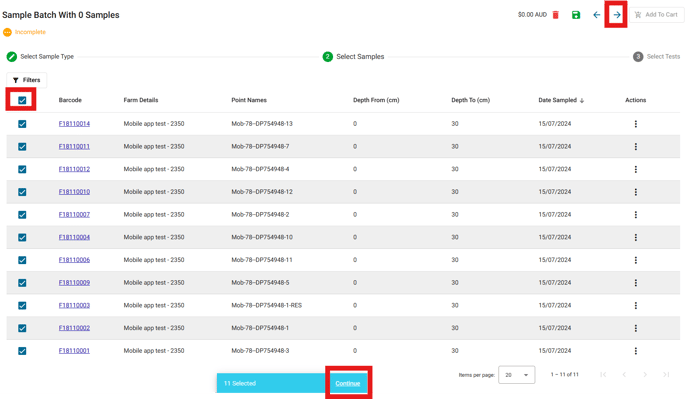
- Use the filter options to organize your samples. You can filter by:
- Farm name
- Depth to or from
- Point name
- Date sampled
- Individual barcodes

- Use the "Select All" button to add all filtered samples to your batch, or individually select samples to add to the batch.
- Once you have selected all samples you would like to add to the batch, select "Continue" or use the arrow to add to the batch.

- If you need to save your progress at any time, select the save icon at the top right of your screen. Once saved, you can log out and, upon logging back in, continue to edit the saved batch.

4. Choosing the Lab and Test Codes
- Select your preferred lab from the options provided.

- Choose one or multiple test codes for analysis.

5. Adding the Batch to Your Cart
- Once you have selected the lab and test codes, select "Add to Cart".

- You can choose to create a new batch or proceed to the payment screen.

- Once you are finished creating batches, select "Proceed to Payment".
- Take a moment to review the details in your batch.
- Check that the lab and test codes are correct.
- You can also enter a purchase order number in the field provided.

-
- Once satisfied, select "Checkout".
6. Submission Confirmation
- Once your submission is successful, download the submission form.

- Print the form and send it along with your physical soil samples.
- You can also download and view the generated invoice.

Happy Sampling!

